Saturday, May 31, 2008

Photography: Watch out for this

A DSLR is a very expensive peace of equipment, and if you dont have the money to be getting a new one each month so to speak, you have to take into account several things that will make your camera last longer! I have listed a few below that you should take into account when handling your camera.

1. Dropping your camera and bumping it
Keep the camera in your camera bag at all times (and make sure the bag is closed) and if not make sure your using the strap to secure the camera to your body, throw it over your neck and let it hang there. Check your strap once in a while, because it can wear out and who knows you might drop the camera! If you don't you might end up with something like this:


photo by: pointnshoot

2. Theft
Yeah people will actually seal your stuff, trust me specially those who know much camera equipment is worth. So when your working in environments that your not completely used to always have your eye on your gear. Try not to carry around the camera to "openly" when visiting places that are know for theft, specially if your going abroad.

3. Salts
If you spend alot of time close to the beach, the salt in the air will ruin your camera unless you wipe it of and give it a bit of an extra rub with some cloth when you get home. The salt will get into the system of your camera. If you find yourself shooting alot in salty areas so to speak, it might be worth while to get a UV filter to protect the exterior of your lens.


4. Water/Moisture
This will ruin your camera really fast, so watch out where you placed your camera, i rea da few times on the web about people dropping their cameras in oceans, toilets etc. Thats were the strap comes in handy! Keeps the camera close to you. Be aware of were you place your camera. Also a important thing to point is when your outside in the cold and moving the camera to warmer condition you might cause condensation, this will get into your camera. So to avoid this, place the camera in your camera bag when taking it indoors and let it rest for a while before taking it out of the bag if you need to.

5. Dust and Sand
Yes you want to watch out for this as well, specially dust it will sneak into your camera and start to pile up. So to avoid this just keep your camera in the bag and store it in a rather dust free environment. I keep my camera in my bag on a table and sometimes put it into a draw, and keep that draw extra clean just for that sake. Sand is also an issue that will scratch your camera when you least think about it. It might be worth while to get a LCD protector for your camera if you don't want any scratches to it. I don't have a LCD protector myself, but i m thinking i should get one

Have a good weekend!


Friday, May 30, 2008

Photography: Understaing the Metering modes

I been trying to figure out a nice way of going about this whole metering thing, but i just realized that i will have to do it in sections, starting of with what metering type does and how it works etc. Pretty much covering the basics of metering if you will.

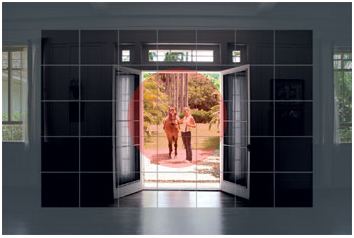
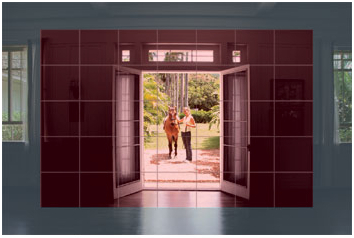
There are three main modes that your DSLR will allow you to meter; Center-weighted, Spot metering and Matrix-metering. I have gone into bit of detail about each metering mode below:

Center-weighted metering:
This asses the whole image area that your looking at through the viewfinder, but
assigns the most importance to the central 40 to 60%. This system is accurate in average lighting conditions, but can be fooled by excessively dark or light areas.

In practice this is most like the spot metering but some what bigger, and it can be used in tricky light situations, for example if the light is coming from behind the subject, if you were to use the matrix mode you would probably have gotten a silhouette, but with this mode you will make suer that the face for example will get the correct exposure.

Spot metering:
Only evaluates a small area in the center of the viewfinder so you can meter for a specific detail of the scene (e.g. when photographing a subject against a
bright or dark background).

This applies about the same to the metering mode mentioned above, which is to use this mode in rather tricky light situations (eg. when you have a light coming from the back). It will make sure the area in the center of your frame will be correctly exposed, this metering mode is some what more accurate then the center weight one because the metering will come from a specific spot, and the camera isn't working by using "average" calculations.


Matrix-metering:
Divides the image area into many small segments and analyses the readings for the best possible exposure. It is remarkably accurate in most situations.
Automatic exposure modes work fine for most scenes, but the meter can only see
scenes as neutral gray and compensates for any deviations accordingly. So you should know when to override the meter's results. If the subject contains more than average
dark or light tones you should take a substitute reading of an average gray area, lock
that exposure and then recompose the image and release the shutter.

In practice, or for starters, i would suggest using this mode, and if the camera isn't getting what you want it to get, try the other modes, or if your really sure on what you want to have correctly exposed.

Below is gif to give you a diagrammatic idea of everything:


So why is metering so important? Well it will work out what area that your camera is going to decided to have correctly exposed so to speak. But often you will find yourself in a pickle and and messing around with the metering modes isn't going to help. I almost always shooting in the matrix-metering mode because i find this to be the most reliable one, specially Nikon's matrix metering mode hasn't failed me BIG time yet.

But there are moments when it comes to portraiture that i will use the spot metering mode because then the main subject the person, is what i want to be correctly exposed. I cannot recall a proper photograph that i took with the center-weight metering mode, this is because i think if i want to use that mode "i might as well use the matrix mode" or the spot metering mode, but then again for those moments when i m unsure i will try the different metering modes!

Hope that helped out some people, did my best in explaining it with some photos i found on the web!


Its rather hard to

Thursday, May 29, 2008

Photography: Beach Photography

Well everyone is well aware of that summer is COMING! YEAH!

I love summer, because it means spending time on the beach, and i ma beach person. Plus its a great place to spend time with your friends, family and a special some one. Go for BBQ on the beach, sit at a fire during night, look at the sunset. Alot of things can be done at beach apart from tanning and swimming in the ocean....

Oh yeah you can photograph it as well!

I often find myself browsing my friends picture on several website, and just a few days back a friend of mine came back from Thailand. And i must say i got bored after a few pictures. The place looked just amazing, but you had those typical cliche shot, of them standing with the ocean behind them, the plane beach shots. And i must say the "landscape" look amazing, but she just didn't capture it good enough for my liking. Now she is not a professional photographer or anything she just wanted to share her experience there so lets not get into detail there.

But i spend alot of time on the beach and use the water in my image because i find its great and because its about a 500m walk from my door.

And her are some tips on beach photography:

1.
Try to get a good focal point, throw a person in there a chair bench, trash pretty much anything that goes beyond the normal beach shot of the still water the overexposed sky and the dull looking sand.

2.
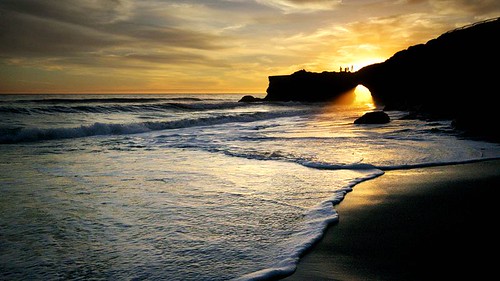
Beaches during the morning's and when the sun are setting are just marvelous. These are indeed golden moments. The advantages of hitting the beach in the morning is that there will be no people around (if your early enough) to get into a landscaping shot if you want a nice setting sun for example and some great silhouettes. When i m down in Spain during the summer times i go home from the beach after the sun has set, this is only because we are up late in the evenings and enjoying a good dinner. But try shooting at these times, anything looks better at sunset or sun rise i promise you that (unless you got a neat storm coming in)

3.
Watch that horizon, what i mean by this is that shots that often have an ending (depending on the setting landscape etc) are going to work better often at the beach because people are just used to see that water and the sky ending and that is it. Get some land in that shot and change the angle a bit. This is very hard to explain but here is an example shot.

Photo By: astrocruzan

4.
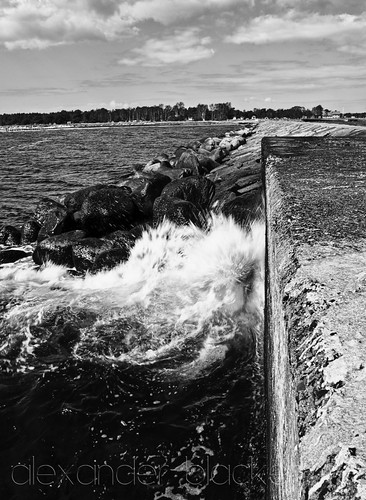
Remember those when you were of and on vacation and you noticed that the weather was garbage, it was windy you had a red flag down at the beach and you guys decide to go shopping instead of heading to the beach or check out some other areas? Well head down to the beach and check the scenario out. Those massive waves could be worthwhile to capture, maybe there is a storm breaking in which goes as a great background in my opinion. Take the shot below for example, it was very windy this day (very common to the area i live in) and i wasn't really in the mood to head out to the beach, but i did anyways, it was sunny. So i walked along this pier to take a look at the water and i noticed that the waves were breaking against some stones, so i cranked a bit longer shutter speed then i normally would and decreased my aperture (big f.-number) so i wouldn't get an overexposed shot and this is what i got:

dreamy waves
not your typical beach shot indeed

5.
What the overexposure at the beach, specially if its sunny out! Use the rule that i been throwing out here alot, about underexposing if you can, if not try the spot metering and meter of the subject that you want correctly exposed this will help you not to get that overexposed shot as well

6.
Fill flash, place your targets with the sun behind them and use a fill flash, this will give you some really nice photographs if your shooting people, they will have a nice glow coming on the area that the sun is hitting them and their face will be correctly exposed because of the flash!

7.
Clean your gear when you get home from the beach, salt and sand are not the best thing for your camera, trust me on that one. I have gotten a few point and shoot cameras ruined after a summer because they haven't been taken care of. I m thinking of getting a underwater casing for my point and shoot so i don't have to worry about this but they are rather pricey. So when your not shooting with your camera, place it back down in the camera bag, and make sure to keep that one closed at all times!

With some input from Ed, i have decided to place his comment update this post.

8.
If you can afford the luxury of a tripod, you can shoot at f22 which will give you longer shutter speeds and thus you can blur the water! Which renders some very pleasing results to the eye

9.
There are some accessories you can get to even improve your beach photography even more and that is by getting a ND grad and a circular polarizer which will give you a more dramatic shot, and the neat thing about polarizers is that it will change the water color to a much more natural color then the color the original camera captures.

10.
If you can bring along a reflector to "lift harsh shadows from portraiture on sunny days"

11.
Oh yeah forgot about one of the most important things, bring water you need to say hydrated and "sun cream to prevent skin burn"

Thanks for the input Ed,

I gotta run down to the beach and think about some other pointers on this subject, i will update this post.

Photography: The key to night photography

I m a big fan of night photography. Just last night i was out doing some in the city, which is to be honest kind of scary when your walking around on your own, and sometimes i just have this feeling i m going to be arrested for no reason, i don't know why.

You have probably read alot about night photography. And every time you read something about it some one ALWAYS has to throw a "get a tripod" or "you need a tripod" to get nice night shots. Well i don't think so. I don't have a tripod and i have gotten some really neat night shots if your going to ask me!

Here are some points that i go by:

1.
Play around with aperture, go for a smaller aperture to get the light looking like stars which looks really nice compared to just a bulb, vary this effect to see what you like the most.

2.
When taking the shot and you don't have a place to stand your camera on so your getting the framing that you want, go around look for some trash pretty much anything you can stand your camera on. Yesterday i was shooting this "waterfall" if you will and my camera was standing on a old whine carton mainly because the floor was wet.

red light chili

3.
Don't go crazy thinking you can place your camera anywhere and you will get a good shot, just because its night out. No you have to apply the same rules here as you would when photographing normally.

4.
Try higher ISO to get quicker shots, some times the noise can add to the mood of the image depending on what you want to capture.

5.
If you cant trigger your camera remotely, use the 10sec timer to minimize the chances of camera shake on your image, trust me taking the same shot about 4 times takes about 2 minutes. Quite long for 4 images if you ask me. If you want to be stealthy, or not be so obvious about your shooting. Turn of the "beep" on your camera not to grab any extra wanted attention.

6.
Depending on where you are, have an eye over your shoulder to see whats going on behind you. Better to be safe then sorry.

7.
I haven't tried this myself but it should work really nicely. When on lets say a 30sec shutter, grab your external flash or an external lightning and run in front of the camera and flash an area see how that turns out i can image it can look quite cool.

wiked buss stop

8.
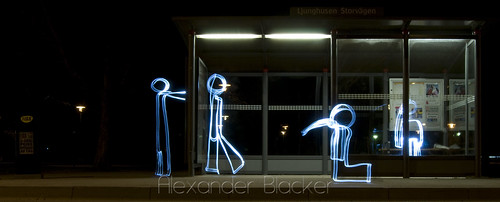
Wear black clothing when doing night photography. Just in case you slip in front of the camera, black wont reflect light so the odds that you will appear on the camera are very slim. Thats why my light paining works and i don't appear on the camera.

9.
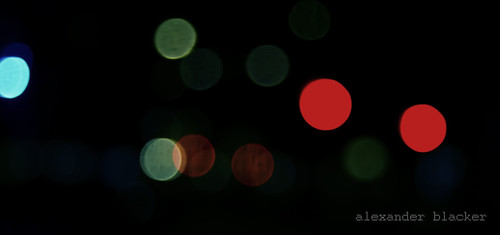
Be abstract, night photography allows you to be very abstract, happens to me quite alot when i m busy looking over my shoulder and i think the camera is done taking a picture so i will pick it up and its still going and all the other lights will appear on the image and you will have a light party, thats what i like to call it. Can look good sometimes and other times its just a trasher

blotter acid

In that image above i through the lights out of focus and had a nice longer shutter on them. Looks quite nice if i m going to be honest, its different.

10.
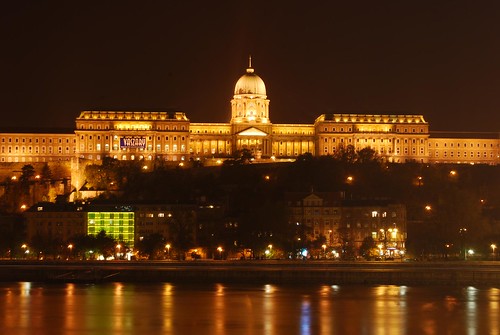
If you think your up for the challenge, try hand holding. Try it, but if its going to be 30sec dont even bother. But sometimes your area during the night will be so well lit you are going to be given a 1sec shutter on aperture priority mode. So try it. Below is a hand held shot that i took during the night in Budapest about a year ago.

Budapest By Night

11.
Look for reflections, they always look nice when it comes to water. And think the more the lights the are the merrier. I like water alot, and specially when it comes to longer shutter speeds. The results can be very interesting. Now combine this with light and you have a image with movement and appealing light. Take the shot below (very touristy shot tho) but it has alot of light in it and a very agitated river in front of it which ended up looking dreamy due to the longer shutter speed, and note the reflection in the water.

Budapest By Night

As i missed out on a post yesterday because i was watching the new Indiana Jones movie, i will be posting a new one later on today. The movie is entertaining by the way if your are Jones fan, but it didn't blow my mind away.

Tuesday, May 27, 2008

Photography: Understandin White Blance (WB)

I m going to cover white balance in this post or as i like to call it WB, just because its shorter and its often a term that is use amongst us lazy photographer that type alot.


There are several reason why we adjust the WB but to keep it simple its because:

You want to get the right most accurate colors in your image - plane and simple

Why would you want to get the colors right?

I think most of us have noticed that sometimes if you take a shot under different light condition the shot ends up looking differently, the main color of the image just doesn't look right. This is because your WB is set to a condition which your are not shooting in so to speak.

Lets get down to business. Lets learn how to adjust our WB

Different digital cameras have a different way or button or you have to go into the menu to change the WB, but no matter what camera you are using the settings or words used to describe the WB mean the same thing. So what are the preset avaliable? And what do they mean?

Auto - this is where the camera makes a best guess on a shot by shot basis. You’ll find it works in many situations but it’s worth venturing out of it for trickier lighting.

Tungsten/
Incandescent - this mode is usually symbolized with a little bulb and is for shooting indoors, especially under tungsten (incandescent) lighting (such as bulb lighting). It generally cools down the colors in photos.

Fluorescent
- this compensates for the ‘cool’ light of fluorescent light and will warm up your shots.

Daylight/Sunny - not all cameras have this setting because it sets things as fairly ‘normal’ white balance settings.

Cloudy
- this setting generally warms things up a touch more than ‘daylight’ mode.Flash - the flash of a camera can be quite a cool light so in Flash WB mode you’ll find it warms up your shots a touch.

Shade
- the light in shade is generally cooler (bluer) than shooting in direct sunlight so this mode will warm things up a little.That covers it pretty nicely.

Now i m going to be honest with you i don't mess around with WB a lot. I often have it set to auto. This is because my camera is pretty good at guessing out the WB and as i shoot in RAW i can always adjust the WB afterwards, so its not that big of an issue for me, but then again i do adjust it and take a picture and if it doesn't look good no matter what i try i will adjust the WB and see if it looks better or more similar to what i m seeing. Note that WB needs to be change back and this is a setting that will be "saved" on your camera until you change it back to what ever you want.

But if i was going to do a whole shoot of indoors shot and i shoot in auto and i notice that its not really working out i would set the WB to what looks the best to save me time in the post processing work. Auto WB works almost perfectly in outdoors conditions if you ask me.

Of course you can work with WB to make a picture warmer or cooler if you want, which can add alot of feeling to the image overall.

There is also a manual WB settings on most DSLR's, and this can come in handy when the preset are really working. This is something i haven't tried yet but i do find myself fine tuning the WB in CameraRAW often.

To set a manual WB, take a look at your manual or do a quick google search on the camera model and manual WB you should find it rather fast. But in the end just use what looks good to u.

Here are some example of the affect of WB, some shots taken indoors with the only thing coming in as a light was the sun.

Camera: Nikon D40x
Lens: 18-55mm f/3.5-5.6 at 24mm
Shutter Speed: Not important (but constant)
Aperture: Not important (but constant)
Mode: Manual
Image Quality: JPEG, fine size small

Note that as i shot in JPEG, adjusting the WB isn't going to work.

Auto:


Tungsten/Incandescent:

Fluorescent:


Direct Sunlight:

Flash:


Cloudy:


Shade:


Judging from these photos with no post processing what so ever not even a crop, i have to say the WB preset that came the closest to getting it right was actually the Auto WB. But then again its not perfect, if i was going to shoot this seriously i would have done it in RAW and adjusted the WB.

I think that pretty much covers the basics, hope it helped some of you to understand WB


Readers: Its now possible to subscribe to my blog

Hello after alot of trouble to get this subscription going, i have now managed to get it going.

On the top right corner of this website there is a field that you can type your email and you will subscribe to my blog and every time i write an entry it will arrive in your email inbox. Now first you will get an "activation" email so your sure of the subscription.

Note: the subscription can be removed at any time if you want on every subscription email!

Monday, May 26, 2008

Photography: Questions to ask yourself before taking a picture

There are several questions most of the time that travel through my head before i press the shutter on my camera. Questions that have tend to help me alot get a better picture.

1. What is the story i am trying to tell?
Or in other words why are you/me taking this picture, is it because the landscaping is nice. Is it because this is a event that i want to freeze or is just one of those special moments, or is it a feeling i want to try to capture? These are questions will make you think twice before taking your image and it will help you in understand those "special moments"

2. Whats the focal point of my picture?
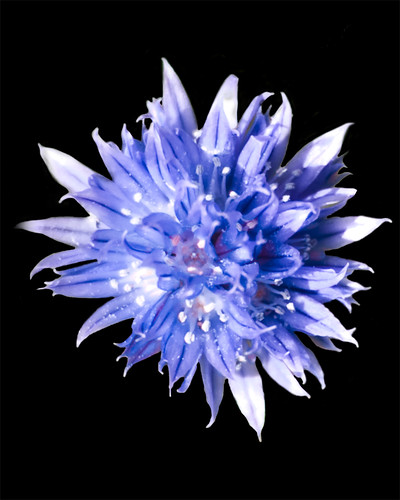
What the tittle states is pretty obvious, but what your looking for here is what were do you want the viewers eye's to fall on the image. Below i placed a flower on a black background to make the subject, the flower pop out alot, and thus leading the viewer to only look at the flower nothing else.

lemon gras flower

3. Are there any competing focal points?
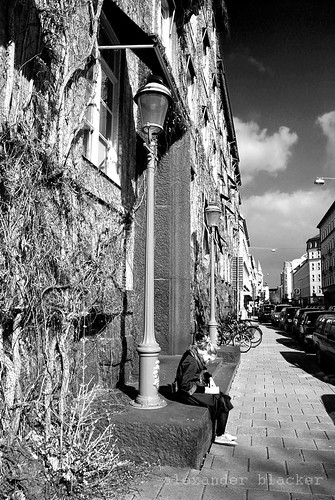
What this means is that if your image has any distractions from what you really wanted to capture. And if there are how do i use them to my advantage and how will they work against me, can i work around these competing focal points? or should i change my aperture to blur the rest? These questions will make you really isolate the subject of your image, thus making it alot easier on the eye's of the view. Below is an example were i failed doing this. I wanted my main subject to be the girl sitting on the stairs, but as i brought back the picture home i realized that the light post was taking up all my attention, and this is an example were the competing focal points took over the image. So dont do this unless that is your intention.

lonley girl black and white

4. Whats doe the background look like?
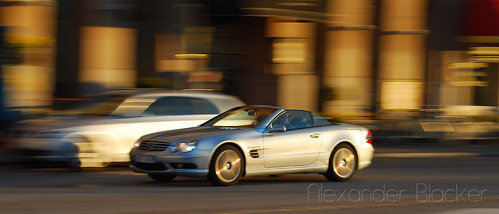
I have covered this before, specially when i m landscaping. The background has to look nice, it if not it can ruin your photo. It can either become a competing focal point or become your focal point without you even knowing about it. So before shooting if you realized that the angle you want to capture your subject from is giving you a bad background move about and change the angle and see how that goes. Or if not blur it if you can. Below is an example of a panning picture i took. The background was really busy so i used a longer shutter speed then i normally would and followed my target with the camera, thus blurring the background and making the main subject the car pop out of the image.

Panning CL 500

5. How am i framing this?
What i mean here is how are you using up the image, am i filling up the entire image with my subject or am i wasting image space with something that i don't want to capture or something that doesn't add to my image? This is sometimes really hard to do from scratch. Thats why the cropping tool is so helpful, where you suddenly can cut out parts of the image that you want and thus creating a much more dynamic photograph.

6.How would this look from a different angle?
Something that i have repeated several times over and over, this will change the look of your image alot. Don't stand put move about when trying to capture your subject!

7. How would this look vertically?
Try placing your camera vertically and see how that turns out, once again an issue that i have covered before but its of great importance. Just make yourself go out one day and only shoot vertical images see how that looks?!

Thats all i can think of now, feels as if i m going to update this! Sorry for taking those two days of there and not posting anything i hope you all can understand!

Saturday, May 24, 2008

Readers: Hey

Hey, i wont be posting a thread today, i m of to work in 5min and i m working all day!

But if i have time i will post a nice little entry, but i think its not going to be possible!

Have a great Saturday!

Friday, May 23, 2008

Photography: Understanding Digital ISO

Digital ISO and film ISO are two different things. I don't have any film that was shot with the ISO i m going to be comparing, but i will try to find a few examples.

In film ISO or also called ASA measured the sensitivity of the film that was being used. So depending on what film you chose to use you where limited to that ISO and couldn't change it unless you changed the film physically. The lower the ISO value the lower the sensitivity of the film and thus the finer the grains of that film would have been. Higher ISO means the opposite to that.

In digital photography ISO measure the sensitivity of the camera sensor. As in film the lower the ISO the less sensitive the sensor is going to be to light and vice versa. Most of the user's out there will try to use the lowest ISO as possible to decrease the amount of noise in the digital image.

So how do I apply ISO?
I rarely use higher ISO then 100 because i m often shooting outdoors and there is always enough sun around so i can shoot at a shutter speed of 1/6 the least. But when i move indoors or i m doing flash photography i will crank up the ISO so i can decrease the power of the flash (thus giving me flexibility). I use it indoors when there is poor lightning, and i know my camera will choose a shutter speed that i cannot hold a steady shot.

ISO is directly correlated to the shutter speed of your camera and so is aperture. As i stated in my previous article bigger apertures or smaller f-number will give you a faster shutter speed so will higher ISO.

So in theory:
Higher ISO = Faster Shutter Speed
Lower ISO = Slower Shutter Speed

But here are some combinations with apertures as well:

Lower ISO and Big f-number = Slower Shutter Speed
Lower ISO and Small f-number = Faster Shutter Speed then above

High ISO and Big f-number = Kind of evens out but leaning towards the Slower Shutter Speed direction
High ISO and Small f-number = Fast Shutter Speed

What i mean above is that if you were to take the same image under the same light conditions those would be the results that you would have to use to maintain the same settings so to speak.

Here is this in practice, yes the orange again

Camera: Nikon D40x
Lens: 50mm f/1.8
Shutter Speed: Varied
ISO: 100 and 800
Mode: Aperture Priority Mode
Image Quality: JPEG, fine size small

ISO: 100 Shutter Speed: 1/5sec Aperture: f/2


ISO: 100 Shutter Speed: 20sec Aperture: f/22


ISO: 800 Shutter Speed: 3sec Aperture: f/2


ISO: 800 Shutter Speed: 1/40 sec Aperture: f/22


I tried to maintain the light conditions constant but i cannot guarantee that its was 100% constant. But it gives you and idea of what i was talking about above. Note that aperture will affect the "look" of your image as you can see here and as i explain in the previous post.

If you want to maximize the quality of your image you want to choose the lowest ISO possible or the optimal ISO for you camera.

a member of the Camera Labs forum whom know alot about the technical things about camera and he shared this means, which is really what takes place on the DSLR sensor very in depth

"Although, strictly speaking, the sensitivity of the sensor, as measured by its quantum efficiency, remains constant. What changes when you alter the ISO is the selected gain of the readout amplifiers or, in other words, the way the photoelectrically released electron count is mapped onto the 12 bit (or 14 bit) output from the analogue to digital converters. "

Thursday, May 22, 2008

Photography: Understanding Aperture

It was pointed out by one of my readers that he wanted to get some more photo tips, so to speak and i must agree that he is right. This seems to be more a photoshop blog then a photography blog so lets change that around. I m going to cover some feature through the following them and showing you them in practice. First thing is first and that is aperture.

Whats aperture? Its a opening in the lens which allows light to come in, and why is this so important? Because light is everything when it comes to photography.

Below is an image of a so called prime lens (50mm F/1.8)
Image 1, represents a wide aperture or a small f-number if you want. And image 2 represents a very small aperture or a big f-number.

Why is aperture so important and how do you apply it:

  • The size of the stop is one factor that affects depth of field. Smaller stops produce a longer depth of field, allowing objects at a wide range of distances to all be in focus at the same time.

  • The stop limits the effect of optical aberrations. If the stop is too large, the image will be distorted. More sophisticated optical system designs can mitigate the effect of aberrations, allowing a larger stop and therefore greater light collecting ability.

  • The stop determines whether the image will be vignetted. Larger stops can cause the intensity reaching the film or detector to fall off toward the edges of the picture, especially when for off-axis points a different stop becomes the aperture stop by virtue of cutting off more light than did the stop that was the aperture stop on the optic axis.

  • A larger aperture stop requires larger diameter optics, which are heavier and more expensive.
So now lets put this into practice, below are photographs i took at different apertures so you could see the difference in practice.

Camera: Nikon D80
Lens: 50mm f/1.8
Setting: Aperture Priority
Shutter Speed: Varied due to aperture
ISO: 100 (maximizing quality)
Image Quality: JPEG, fine size small


Image 1:


f/1.8
Image 2:

f/2.5

Image 3:

f/3.5

Image 4:

f/5

Image 5:

f/7.1

Image 6:

f/10

Image 7:

f/14


Image 8:

f/20


Image 1, again so you can compare the small aperture vs a big one

f/1.8


So how do i put this to practice:
Well the image are pretty explanatory on what aperture does. But its not all on the good side, the higher the f-number you have or smaller aperture the longer shutter speed you will need, a slower shutter speed if you will. This is why lenses with a big aperture or a small f-number are good in low light conditions they will open up wide and take in alot of light. They are also called fast lenses because the bigger the aperture the faster the shutter can be. If i remember correctly the shutter speed of f/1.8 was something like 1/200th of a second while f/20 was 1.6seconds.

So whats the big deal with aperture and how do i apply it:
Well in most cases you will be using a bigger aperture when shooting portraits to blur the background thus making the main subject hop out of the frame. You can also use big aperture when there light conditions that you find yourself in are not good, but taken into account the bokeh (blurriness) that will happen to the image.

What about smaller aperture?
Well i often use a tighter/smaller aperture when shooting landscapes, because it will give a really nice DOF (depth of field) everything in the image will look in focus and very detailed.

p.s when people are talking about DOF they are pretty much talking about aperture.

Here are some real life example of how i have played about with aperture:

close up
f/1.8


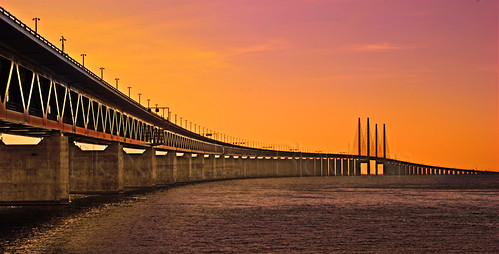
Sunset at Öresunds Bridge
f/16


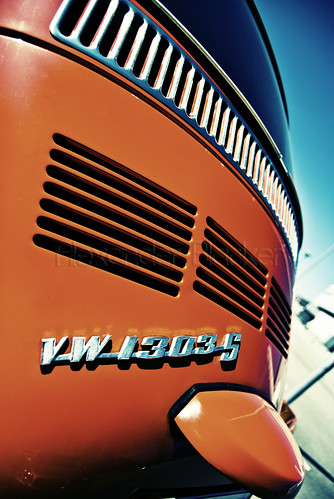
retro beetle close up
f/3.5

Wednesday, May 21, 2008

Photoshop: Poll Do you have Photoshop

I cover alot of Photoshop tutorials because this is the software i use so i was interested in this polll:


Photoshop: Basic Cloning Tutorial Part 2 (2)

Now i pretty much cover the stamp cloning tool but there is another one as well. Its called the "Healing Bursh Tool" and can be found under the band-aid looking symbol in Photoshop.

One thing that i find is very hard to clone is bigger areas, or cloning out bigger object so to speak and make it look natural. The problem with the cloning tool is that your rather limited to the areas you can copy and with combination of opacity it can come to look OK, but for a trained eye you will not get away by just using the cloning tool.

The healing Brush tool works as a smart cloning tool if you will. It takes into account the region that you selected as your source color so it "blends" in better with the area your cloning on so to speak. Thus rendering better results because it takes into account the area your healing to so to speak.

Overall it works the same way (hot keys and how to set the source) as the cloning tool. By holding down the Alt key and then selecting your source and then painting over the spot that you want to replace or heal away.

Below is a is the original photo as well as a try to using the clone tool and the brush healing tool.

Original:


Cloning Tool:

Healing Brush Tool:


Now its not all good new with the healing tool so to speak it has its disadvantages as well, yeah i know they couldn't just make a great combination could they, but these tips should help you getting a great results:

-Use a bigger size brush then you would with the cloning tool, use a bigger brush then the area your "healing" so to speak.
-Use a very hard brush, the healing tool softens and blends the image quite well, you may need to adjust this depending on what your doing.

Tuesday, May 20, 2008

Readers: I was Interviewd

Hello there, i just wanted to let people know that i got some "press" work if you will. I was interviewed by Zane who runs the his own blog, some interesting stuff. He has got a spaced out blog compared to mine!

To check out the interview click below:

Take me to the interview

Monday, May 19, 2008

Photoshop: Basic Cloning Tutorial Part 1 (2)

One thing I love about Photoshop is that it allows me to clone things, away or replace a sampled area with another. There is always that moment when your going to take a picture of something really nice but something just get its in the way, or maybe you forgot to clean your sensor and ended up with some awful dust spots on the image? Well fear no more I give you the cloning tool, or the magic tool!

Let’s get started:

The cloning tool or the stamp, has the hot key “S”. Knowing hot key’s on Photoshop is going to save you plenty of time in the long run, so get to know a few at least.

I will be starting of by showing the original image and the final product and how I did (only using the cloning tool) and then show the final product.

When I clone I work a lot with the opacity of the cloning tool because I don’t want to make the cloning obvious and my bet is you neither want to that.

I will use the image of my best friend and his girlfriend sitting at the in the backseat of my car. A great photo of how he was feeling and how she was feeling at the time (he was really tired he just got home from the military service while she didn’t want to be on the photo)


Start of by clicking on the clone tool or press “S”

Then you need to sample an area that your going to copy or clone so to speak, to sample hold down the “Alt” key and left click on the desired location, NOTE: that you will need to resample a lot of times, always try to resample around the are your wanting to clone out.

A big note, when ever you sample not that that sampling are will be as big as the current brush size your using, this is a something that Adobe has not incorporated into this tool which is quite weird, some how the sampling tool is always the same size, smaller brush size are easier to work with.

In this case I clicked just around the hair the, and I start of with a opacity of about 50%. You want to start out a bit rough and then cover the biggest chunks so to speak first. Then decrease the opacity to about 10% and start fine tuning the image.

Zoom in its very important, so you can see how precise your are being.

Now lets take a look at the results:

I cloned of that annoying hair that was ruining her face, and now the image looks a lot better, her face looks much more cleaner, and can you tell that I have cloned it out? I cannot tell at least. I find it hardest to work on the skin because it has so many different tones.

Now to Photoshop CS3 cloning

Photoshop CS3 cloning: using different sources and the cloning tool. Photoshop CS3 has the neatest cloning tool, a tool where you can select different sources (images) and clone them onto one image, this new cloning tool allows you to preview the cloning your going to make as well as adjusting the size angle and pretty much everything you can think of.

First lets bring up the tool to do so do the following:

Window>Cloning Source – this opens up a dialog box that displays 5 cloning stamps, each stamp can be used on a separate image. If you check the box that says ”Show Overlay” you will see an overlay of what you will be cloning. And you will also see a box that say W:100% as well as H:100% this is telling you that the image that your sampling from is going to a cloning of exactly 100% both height wise and weight wise. This can be adjusted for a realistic perspective.

Before starting open all your images in Photoshop CS3. I will be using a total of 4 images, and choose one as a background (the main image that you will be cloning things on to). And on your background image create a new layer. And then start to sample of the other images. Note that you will need to click a diff stamp every time you want to sample of a new image.

Here is my background image that I started with:
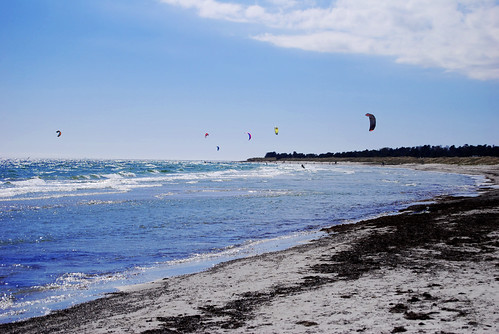
Then all you have to do is clone the objects back in, make sure that your are on the new layer. Because once your done you go back to the new layer that you have created and you erase the stuff that you accidentally cloned in, the wonders of layers!

And here are the final results (note that I adjusted the levels of both of the images and their colours that is why they don’t look exactly the same): Note that the water is suddenly crowded with kite surfers that where not there from the begging. I added quite a few!
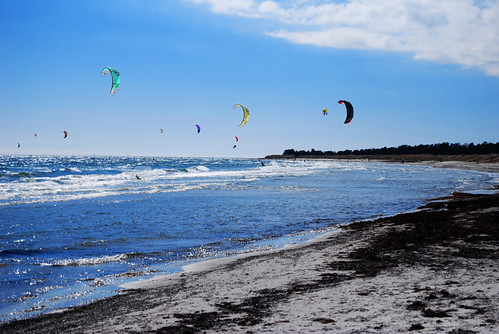
Cloning fun: Well yes you can also have some fun with cloning, I like to fun things so I’d just though I share this as a little extra:

Her is the original picture


I m just going to take their odd picture of myself (I have a project for it in mind if you where wondering), start of by adjusting the levels (Image>Adjustments>Levels play with the sliders till it looks good), give it some sharpening as well (Filter>Shapren>Unsharp Mask) lets also adjust the colours (Image>Adjustments>Hue/Saturation) play with the sliders till I get something I like:

So what I did here is that I just cloned another of myself like a shadow or a ghost effect by using the clone tool and a opacity of 50% note that you cant let go and click over the same spot again because this will make the totally cloning opacity of that location 100%, and thus you will not have a ghost effect. This is just one example of how you can have fun, you can also clone yourself with some famous people if you wanted to but who would like to do that, unless you have a great image of Winston Churchill. Yeah I had a stain on my shirt as well (a few) so I cloned those out as well.

And here is what I got:


I dedicate this tutorial to my older brother, because things are looking good for him it looks like he is going to move to his third year in his studies to become a doctor

How to: Avoid getting a dirty sensor

I hate dust, no matter where it is, and ifs on my sensor even worse! It can ruin a good shot and it i will just add a bunch of extra work in post processing, which at times you just don't have those spare minutes to grab the clone tool and clone half of the image or even worse you have something like below:


If your sensor has reached this stage, your not really treating your camera the way your supposed to, so i m going to line up some tips on how to keep it clean, or at least decrease the chances of it getting dirty or dusty or even scratched:

1.
If its windy outside and your buy the beach for example, don't change the lens right there find a wind free region or go back in your car or else were the risk of getting something into the sensor are slim. Alternative don't change the lens you have on (prepare before going out)

2.
Very important, turn your camera OFF when changing the lenses. Why? Well just in case you where to press the shutter release this would flip the mirror open, and also the more reasonable explanation: is that some camera have an electrical charge on their image sensor and this will attract dust towards it it.

3.
Try not to place the camera with the sensor/opening facing upwards but downwards, this prevents any dust or anything dirt flying over the camera at the moment to fall in the hole - its impossible that dust will fly up into your camera (or at least the odds are slimmer then vice versa)

4.
Prepare the "switch" lens as i like to call it before removing the lens that is mounted on the camera is going of. This limits the amount of time that opening will be open. Its easier to clean the rear end of a lens then the camera sensor.

5.
Don't place a dirty lens on the camera, this is going to get dust on the sensor. So, if you can blow with a blower or something of anything that is at the rear end of the lens just to be on the "safe" side.

6.
If you don't know how to clean your sensor, PLEASE DO NOT DO IT! A SCRATCHED SENSOR NEEDS TO BE CHANGED which is really expensive, you might as well get a new camera. And if your going to clean it yourself make sure you know what your doing and that your using the proper equipment and that your cleaning the sensor in a "dust" or at least less dusty zone/area.